
With team spaces, your team has a home base where you can bring together the knowledge and context needed to initiate work, coordinate what is in progress and stay aligned on next steps. Read this article to learn how to efficiently set up and use a team space.
Plan availability: Enterprise only.
- Available on FedRAMP accounts.
- Read the Lucid Plans article for more information about what is available on your account or the Upgrade your Lucid account article for instructions to upgrade.
Watch: Team spaces
Access a team space
To have a team space, you must first have a team. If you haven’t already created a team, see our Use team hubs in Lucid to collaborate and stay organized article to learn how.
Once you’ve created your team, you can access or create your team space from the team hub. To do this:
-
Open the workspace dropdown from the left-hand side of the Lucid Home Page.
- Select a team from the list that appears.
- Select your team space from the navigation menu on the left-hand side.
Existing team spaces will open in a new tab. If you don’t already have a team space, create one by clicking Create and Share from the popup that appears after you select Team space.
Check out the sections below for more information on how you can use your team space to organize resources, prioritize tasks, track progress, and check in with your team.
Tip: You can turn an existing team document into a team space by right-clicking the document from the team hub and selecting Make primary team space.
Organize team content and resources
Your team space is a home base where your team can find the resources and context they need to coordinate effectively and stay aligned. Lucidspark features such as embedded links, Frames, and Dynamic Tables can help you effectively set up your team space by organizing team content, working spaces, and documents in one easy-to-find location.
Add content and resources
In Lucidspark, you can embed several different types of links and media in your board. With many of these embedded links, you can edit and view them directly from the team space without having to leave the board. This makes it easy for your team to find and work on important team documents.
To add Lucid links or external embedded links from sources such as Google Drive, Microsoft OneDrive, and Figma, follow these steps:
- Click
the Import icon from the top of the Primary Toolbar on the left-hand side of the workspace.
- Select an option from the menu that appears.
You can also paste a URL directly onto the Lucidspark board to create an embedded link.
Learn more: For more information about what types of embedded links are supported, check out our Embed links and media in Lucid article.
Use organizers
After you’ve added resources to your team space, you can use organizers like Frames and Dynamic Tables to organize them however you need.
To add an organizer:
- Click
the Organizers icon from the Primary Toolbar on the left-side of the canvas.
- Select an option from the menu that appears.
Determine team priorities
In addition to being a repository of resources, your team space is a location where your team can brainstorm ideas and use Visual Activities to prioritize them.
Brainstorm ideas
By using Lucid’s infinite canvas, your team has plenty of room to brainstorm directly within the team space. When you’re done, you can quickly send any and all ideas to a new Lucid document to keep your team space clean and organized.
To send objects to a new Lucid document:
- Select the objects you want to send to a new Lucid document by clicking and dragging your cursor over them.
- Right-click the selection.
- Hover your cursor over “Send to”.
- Click New Lucidchart document or New Lucidspark board.
The objects will be sent to the new Lucid document and an embedded link of the new document will appear on the team space.
Prioritize ideas with Visual Activities
Instead of sending the brainstorm ideas to a new Lucid document, you also have the option to add them directly to a Visual Activity, where all team members can prioritize and categorize them.
To add objects to a Visual Activity:
- Select the objects you want to add to the Visual Activity.
- Right-click the selection.
- Click Add to visual activity.
- Select a Visual Activity option.
The Visual Activity will be added directly to the team space canvas. Team members can then prioritize or categorize ideas by clicking Start on the center of the Visual Activity.
Learn more: For more information about creating, participating in, and viewing results of Visual Activities, check out our Get started with Visual Activities article.
Track progress on projects
Once your team has determined what projects to prioritize, use your team space to keep track of progress and keep stakeholders informed on progress by assigning tasks and using Lucid Cards.
Assign tasks
Directly from your team space, you can assign tasks to team members. To do this, follow these steps:
- Right-click an object on the board.
- Select Add comment.
- Type a message in the panel that appears.
- Check the box next to “Assign task”.
- Click Assign.
Users will receive a notification in their Lucid account and as an email when a task is assigned to them.
Review all assigned tasks
Using the comments panel in your team space, you can review all tasks that have been assigned to check on their progress and follow up. To do this:
- Click the down arrow icon to the right of
the Add Comment icon in the upper-right corner of the workspace.
- Click Tasks at the top of the panel that appears.
Learn more: For more information about how to Add comments and assign tasks to collaborators in Lucid, check out our article.
Use Lucid Cards
Another way to track progress on current projects is to use Lucid Cards, which help provide both an overall view and detailed look at each team member’s tasks.
Add a Lucid Card
To add a Lucid Card to your team space:
- Click
the More tools icon from the Primary Toolbar on the left-side of the canvas.
- Open
the Card menu in the panel that appears.
- Select Lucid Card.
- Click anywhere on your board.
Once added, you can edit Lucid Cards and organize them in a way that best suits your team.
Learn more: For more information about how you can Use Lucid Cards to plan, organize, and assign tasks, check out our article.
Available Lucid Card integrations
In order to help increase team coordination among various systems of record, Lucid has integrations that allow you to import tasks from various project management softwares. Click the options below to learn more about how to install and use each one.
Check in regularly with your team
Whether it's during team meetings, stand-ups, or one-on-ones, staying connected and up to date with your teammates is crucial for productivity. Your team space is a valuable resource that can help you incorporate regular check-ins with your team.
Bandwidth and availability check-in
Understanding your team's bandwidth and keeping track of important dates allows your team to be as productive and in sync as possible. Lucid offers an extensive range of features and templates to help you do just that.
Sync on bandwidth
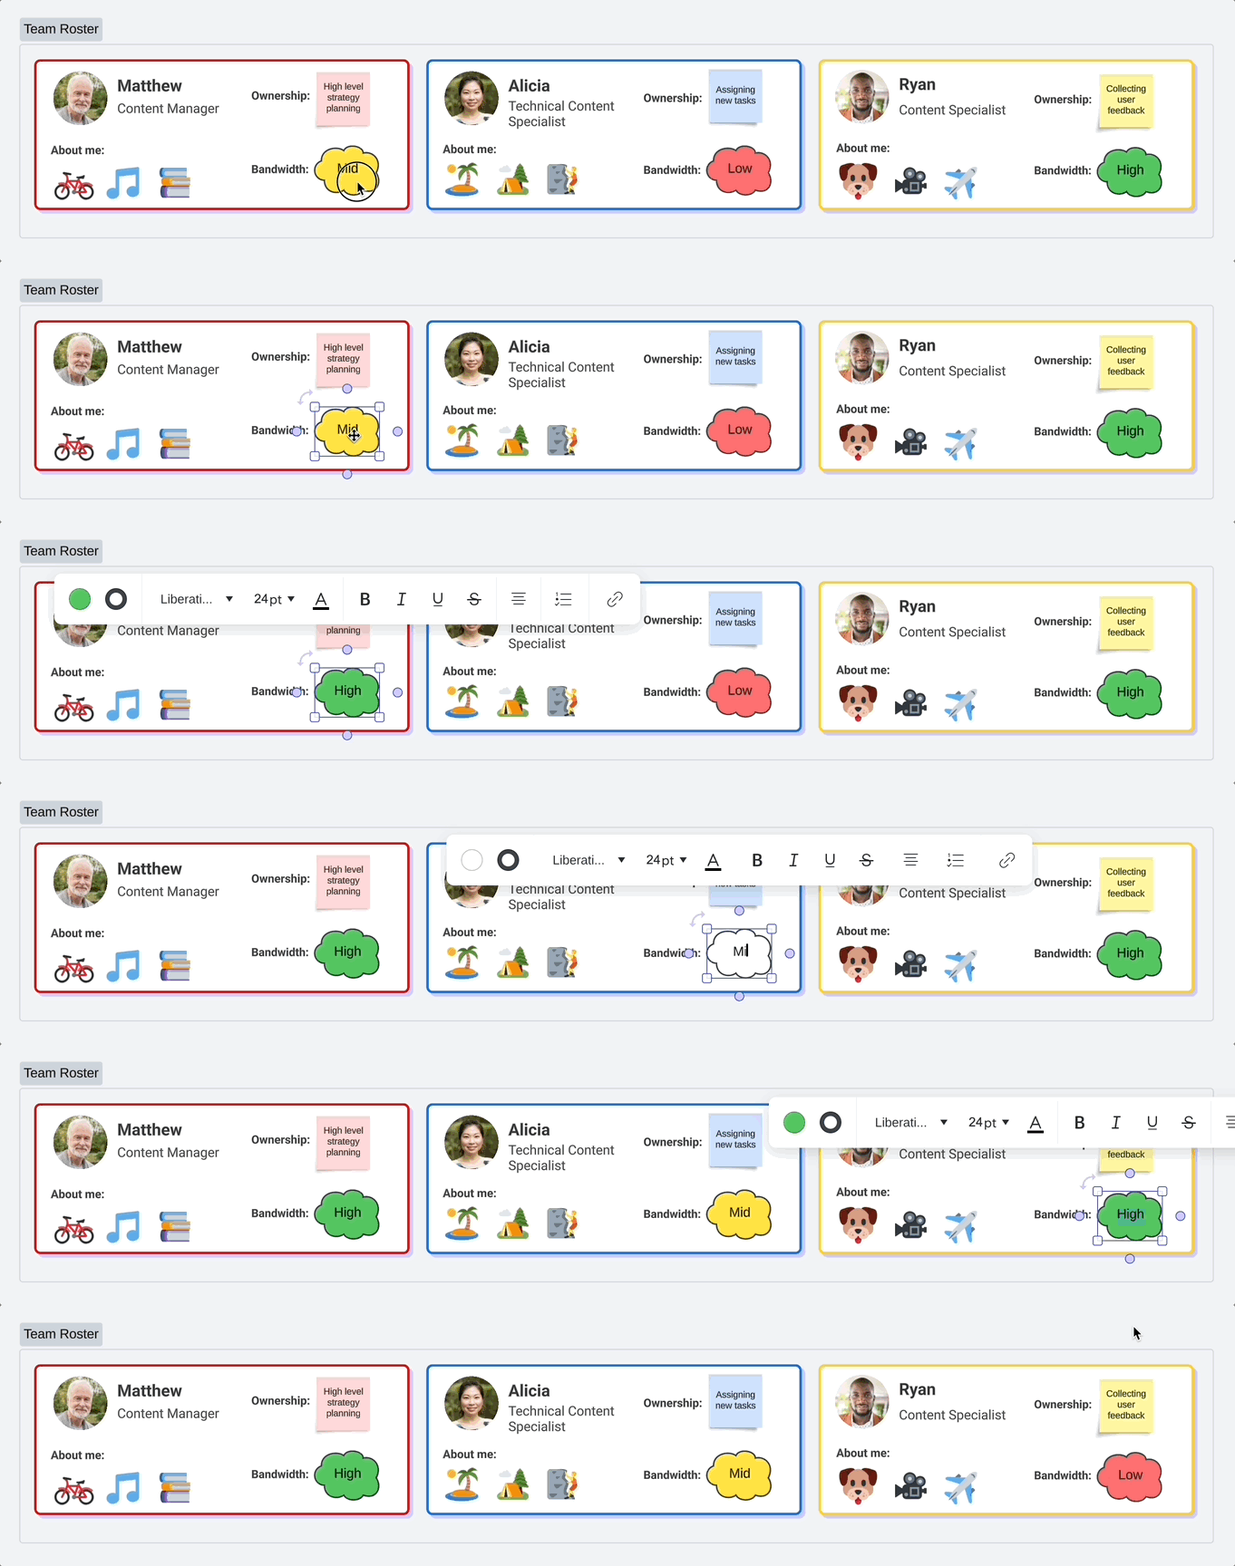
Using Lucid’s universal canvas to edit your team space in Lucidchart, you can enable conditional formatting to see a visual representation of each member’s bandwidth.
To edit your team space in Lucidchart, click the product icon in the top-left corner of the workspace and select Edit in Lucidchart. From here, you have all of Lucidchart’s tools available to you.
Once you are editing in Lucidchart, follow these steps to access conditional formatting:
- Select the shapes you want the conditional formatting rules applied to.
- Click the conditional formatting icon from the Primary Toolbar on the left side of the canvas.
- Click Create rule.
From here, you can set up rules to best fit your team’s needs. Here is an example of a rule set up to visually represent low bandwidth with red fill color:
Learn more: For detailed information on how to set up conditional formatting rules, check out our Add conditional formatting in Lucidchart article.
Set up a team calendar
Using Lucidspark’s calendar template and sticky note banks, you can use your team space to keep track of important dates, team member availability, holidays, and more. Start by finding a calendar template by clicking the Templates icon from the top of the Primary Toolbar on the left-hand side of the workspace.
After a calendar is in your team space, you can use sticky note banks where each team member can drag an infinite number of sticky notes with important updates onto the calendar.
To add a sticky note bank:
- Click
- Select
the Quick tools icon from the menu that appears.
- Click Sticky note bank from the options and drag it onto the workspace.
- You can change the color of the sticky notes to color code for each team member.
Connect personally with your team
A high-functioning team benefits from team members who are connected and comfortable with each other. You can accomplish this by using your team space as a place to get to know each other and provide personal updates.
Visual Activities are an excellent way to do quick icebreakers. Build your own or select from templates such as choosing your favorite type of chocolate or debating the definition of a sandwich.
You can also create a dedicated place to share personal life updates or create a virtual bookshelf where each team member can share what books they are reading, what shows they are watching, or what music they are listening to. The possibilities with team spaces are endless.
Give feedback on this article
Have feedback about this article? Tell us about your experience here.